The Smallest Nightstand

The first thing I need to say is that I am in no way getting paid by Ikea to write this post.  I wish I was! The second thing I need to say is that I am tired of everything being called a “hack.” And yet, as I did my first Ikea hack upgrade I felt very proud to be joining the ranks of people who have come up with a cheap and creative way to solve a problem.

Our problem was our need for a very small and very affordable yet functional nightstand. I looked for months and nothing met all three needs. Eventually we ended up taking a walk around Ikea and I refused to leave until we found something we could work with.

The answer, my friends, was the Valje wall cabinet in turquoise:

valje-wall-cabinet-turquoise__0290140_pe424849_s4

At 13.75 inches all the way around, this puppy would be out of the way, functional and at $25 a pop I was ecstatic about the price. It also jives with the Hektar wall lamp I had picked out. At $16 each my bedside situation was ready for the most affordable upgrade imaginable.

hektar-wall-clamp-spotlight-with-led-bulb-gray__0455660_pe603638_s4

e67d23cc6ce40338c50fb3499ac07382e09c31f2461376ea23a59c804906d1a7


As I searched the internet for examples of floating nightstands to learn about placement, Something I hadn’t anticipated occurred.  Turns out I don’t like floating night stands. Apparently I just like me some legs on a piece of furniture. Cue massive search for cheap legs. Enter realization that one must also purchase brackets to install legs.  At $5 a leg and $2 a bracket, this was quickly turning into a pricey project :(.


As I stared at the leg section in Lowe’s, I decided to try something potentially stupid. I purchased two round dowels for less than $2 each and headed home.

This past weekend we embarked on operation Ikea hack Upgrade. Our Valjes were assembled without their backs so that we could easily access the outlets on either side of our beds. Josh cut the dowels into 8 inch pieces. We attempted to sand said pieces and only got into a mild argument about how hopeless this project was. We drilled pilot holes in each one and then I spray painted them metallic gold.

IMG_0122.jpg

We drilled pilot holes two inches from the corners of our Valjes, screwed the legs into the table with the screws heading down through the bottom piece of the Valje et voilà! We got legs!

img_0372

They aren’t super sturdy but that’s ok because these nightstands aren’t going to hold a lot of weight. They are going to sit, look pretty and they certainly won’t get in the way! I may get baskets or something to put into the open squares if things get messy but for now I love the way my books look lined up!

Before:

img_0123

After:

img_0124img_0125


Cocktail Hack Upgrade: Kentucky Bourbon Peach Smash AKA YOU JUST GOT JAMMED!

jammed

To me, the essence of the hack is that you take something that was meant for one thing, and you adjust it to meet your own needs on the cheap. The matching cocktail for this project was not an obvious one, but the perfect thing jumped out at me when I reluctantly googled cocktail hacks. The rolling of the eyes stopped as soon as I started reading about jam in cocktails.

I recently made peach jam (I added basil from my garden) with some peaches that were about to go bad. I can’t get enough of it on toast so the thought of putting it in alcohol had me quivering with antici…..pation.

giphy.gif

I’ve seen varied opinions on how to do this, but it seems like the standard is:

  • 2 oz of spirit
  • 1 oz fresh citris
  • 1/2 – 1 tablespoon of jam

Jam drinks must be strained and it seems like best practice to shake them. Bourbon and peach jam seem like the perfect transitional fall drink with one foot in late summer and one embracing cooler weather.

img_0375

For a Kentucky Bourbon Peach Smash from the lovely kitchen shake and strain over a large cube of ice:

  • 1 1/2 oz bourbon
  • 1/2 oz lemon juice
  • 1 tbl. peach preserves
  • one peach wedge for garnish
  • top with soda water if desired

img_0376

It was scrumptious. As you can see I couldn’t wait to taste it before taking a photo of it. I used an ounce of lemon juice and two ounces of bourbon but suggest using half an ounce of lemon because I wouldn’t have minding the acidity toned down just a tad. As always, adjust for your own taste and enjoy!!

Posted in Uncategorized | Tagged , , , , , , , , , , , , , , | Leave a comment

Flower Power

Melissa (of Hooch & Home South) inspires me in many ways, but her latest post has moved me to pull out the old laptop and begin tapping away. It has been a long time since I’ve written anything . Does this require an explanation? I’m not sure! The short of it is that some minor health problems (for which I stopped drinking for a few months!) and a marathon of weddings this year has me trying to do a lot less.  This is incredibly different for me.  Today is a very lazy Sunday and I’ve already made brunch for my family, whipped up what will be some homemade vanilla extract once it finished extracting in a month, mounds of laundry and began an overnight infusion of garlic to combat what I believe to be a white fly attack in our garden. So many small projects are calling my name right now but I’ve missed you H & H.  I’ve missed you a whole lot.

And what better way to say rekindle our love than by sending a bit of flower power into the world right now? As summer ends, we have limited time to enjoy end of the summer flowers and to sip the last of any whimsical cocktails we can find before giving ourselves over to the harsh warmth of brown liquors that come with sweaters and boots.

I was lucky enough to attend a flower crown workshop with Dan from the fabulous Floradelphia.  I was already impressed by the work he had done at a friend’s wedding, so a trip to his studio was quite a treat! Before meeting Dan, I was of the mindset that flowers were generally a waste of money unless you were really trying to cheer someone up. Why spend even $15 on a bouquet that will only last a few days? Dan would whole heartedly disagree.  He believes that flowers are not just about the way they look. He is even more interested in the way they make people feel. His passion was contagious and changed the way I think about flowers forever. Time has proven his so right! I now love coming home to a table with even a simple arrangement. And when crowning your head, they make you feel fabulous.

img_5784

Making a flower crown is easy and the possibilities are endless.  It is a beautifully short-lived project if done with real flowers, but you could always use dried flowers for a more permanent accessory. Make sure you check out Dan’s pro-tips before moving on to the cocktail!


Flower Crowns

“Flowers can be a transformational moment…I want people to feel something in that ephemeral moment” – Dan Fingerhut, Owner of Floradelphia

What you will need

img_5777

  • Cloth covered floral wire can be found at Michaels and obviously on an infinite amount of websites.
  • Florist tape (pulling this tape activates its stickiness)
  • A floral glue is optional and can get very messy very quickly
  • Ribbon if you are trying to get fancy

How to do it

  • Measure the size of your crown by wrapping the floral wire around the crown of your head. Before cutting the wire, double it to create a stronger crown with more surface area. Then twist it so that it stays together
  • Begin by choosing a flower with more than one color, and then add more flowers that pick up on those colors (Dan says it’s “just like getting dressed”)
  • Leave at least three inches of stem on each flower and arrange your flowers in the way most pleasing to you

  • Cut long pieces of floral tape and stretch one end to make sticky
  • Starting with your center flower, stretch and wrap floral tape around the stems to hold them into place
  • Glue on any extras that can’t be wrapped to fill in space or take your crown to the next level – also to add foliage to the back to fill in space
  • Wrap a ribbon around any exposed wire at the back of the head and leave trailing down your back if you are trying to get fance
  • Try to impress your floral master (pictured in the background)
  • Attempt to take selfie
    img_5779

Pro Tips from Dan:

  • Always use sharp scissors when cutting flower stems (dull scissors will crush the steps and flowers won’t be able to drink)
  • Always cut flower stems on the diagonal
  • Make sure you don’t leave any leaves on stems that will be under water level
  • Dirty vases can cause problems! Make sure to use a clean vase using vinegar
  • Actually use the flower food that comes with the flowers (it contains flower calories and anti-bacterial stuff)
  • Remove any dead leaves or flowers so they don’t steal calories from the rest of the flowers
  • Change your water every two days and always add plant food (this can even just be sugar) to make your flowers last longer

I’ve been playing around with my own bouquets while at my mom’s house. Here I used mint, lavender and a number of other leafy beauties to decorate our table. I followed Dan’s advice about creating many levels and textures. Flowerless bouquets last a long time and can be magnificent in their own right!

img_7480


An English Garden Cocktail

img_7525One of my favorite spots in Philadelphia is a The DandelionSteven Starr’s gastropub features wonderful drinks and very tasty yums, but one of my favorite things about this place is the decor and the ambiance. A few Saturdays ago, I found myself in the Dog Bar, a room in The Dandelion whose decor is dedicated to man’s best friend (even the curtains have dogs on them!). While shoveling their amazing curry deviled eggs into my snout, I sipped on a delightful cocktail called An English Garden that I was able to recreate last weekend.

Ingredients:

  • Pinot Grigio
  • Beefeater Gin
  • St. Germain
  • Lemon
  • Cucumber
  • Mint

img_0120

I would suggest playing around with the proportions a little more but here is what I came up with: Mix 1 oz of gin and 1 oz of St. Germain in a glass. Add 2-3 oz of Pinot Grigio. Add 3/4 oz of lemon juice. Add two slices of cucumber, a sprig of mint and two lemon slices. Fill glass with ice and stir.

Enjoy outside in your garden (or in may case, enjoy outside on your stoop because my tiny garden has been taken over by two tomato plants and it is no longer pleasant to sit out there – stay tuned for Julia versus the white flies in an upcoming post – the secret weapon arrives this week in the form of 150 ladybugs!)

img_7520


And finally, a shout out to my mom! Who has also taught me about the importance of flowers and who looks adorable in them!

img_5787

Posted in Uncategorized | 1 Comment

Adventures in Moving

It has been just over a month since Hooch & Home South relocated back to the land of bourbon and horses and it went pretty smoothly, so I thought I’d share some of my moving insights as an excuse to also make a new cocktail…as a toast to our new location!

Although I had been job searching for many months, the job that finally got us to move was one that took about three weeks from application to first day on the job. Needless to say, it was a quick turnaround! Luckily the timing worked out so that I had a full week off of work between jobs and we were able to get most everything packed up and ready to go. Here’s a few of my tips and tricks for moving, especially on a short deadline.

  1. Hire professionals. As long as I live, I will never spend better money than money spent on paying people to move my stuff. I was so used to the carefree days of college and begging for the labor of my friend’s gracious family that the first time I hired movers was a revelation. This time around, we hired people to load and unload the truck that we drove from South Carolina to Kentucky, which helped save us some money. Not only did we get to stand aside as strong men carried our stuff up and down stairs, but they also loaded it expertly so that everything fit and nothing was damaged. Uhaul makes it very easy to connect with local movers and they aren’t even paying me to say that. If you have the ability, spend the money. It is SO worth it.
  2. Use decent boxes, good tape, and lots of packing material. I am such a cheapskate that I have never bought boxes, instead relying on the kindness of friends and family and stalking the grocery store stockers to steal good boxes from them. However! I have learned that using boxes that are in good shape is especially critical when hiring movers to load your things. Boxes get beat up in the process, so starting with a beat up box means you are risking damage to your stuff unnecessarily–and not just the stuff in the crappy box! Also, find a source of old newspapers and use them to pad your belongings and fill up boxes that aren’t completely full. A decent box that collapses in on itself is an easy hazard to avoid.
  3. Label judiciously. Even if you can’t hire people to haul your things around, labeling is a critical part of making a move efficient. This time around, I opted to label boxes both by room and with a detailed inventory of each box’s contents. It didn’t take that much longer to write out a list and tape it to the top and I know it helped me stay sane in a sea of “Kitchen” boxes when I was looking for the one fine mesh strainer we have so we could filter the cold brew.
  4. Try to pack by level of use. We cook a ton and we knew we would be in Kentucky for a week before we would be able to bring the majority of our stuff, so we packed up what we called our “survival kitchen”. Dedicating a couple of boxes to the things we knew we would want to have immediately (cast iron skillet, stock pot, colander, spatula, coffee making materials, flatware, a few plates and bowls) was not that difficult to do and it helped make our transition that much easier. This tip also works well for other critical need items, like work-appropriate clothing and booze! Luckily I packed a box of bourbon, Fernet, and gin, so we were pretty well set for our basic cocktail needs throughout that rough time.
  5. Make peace with the chaos. Although we did try to pack intentionally, there comes a point in any move where things just get shoved into random boxes. Realize that there will come a day when you will rediscover something you forgot you had because it was in a box with completely unrelated stuff. It also helps to have an out of the way space somewhere in both your old place and your new place where less important things can be shoved while you work your way through packing and unpacking. We lived with Box Mountain for a few days and now our garage is serving as the “I don’t know how to/can’t deal with this right now” landing zone.
  6. Clean as you go. Since we were moving quite the distance, we didn’t have a ton of time to clean our old apartment once all our stuff was out. As we worked to pack everything up, I had a list of cleaning that could be done along the way if one of us needed a break from confronting all our possessions. As a result, by the time the movers came, all we really had to do was sweep up and do a final once over as we left. That is another excellent benefit to hiring movers: you can clean as they load!
  7. Find a way to stay motivated. We did really well for the first week or two of unpacking and then we both ran out of steam for one reason or another. Part of what has kept us working on Box Mountain (now Box Hillock) was the threat of visitors. Hosting a couple of friends for dinner helped us power through to get the common area and kitchen ready for guests. Hosting people again a week after that helped motivate me to tackle what was left to do in the bedroom.
  8. Make lists electronically. I know this sounds like a weirdly specific tip, but as a person who highly values list making, having my lists either on my phone or on Google Drive was way better than trying to keep track of the fifteen different sticky notes I had floating around South Carolina and Kentucky.

Moving is always a stressful process, but there are a few ways to help control the madness and make the transition a little bit less painful. Good luck!

28592503993_d3afbe464f_o

South Carolina putting on a show before we leave.

29134648461_0c4d15047c_o

He is nothing if not a helpful kitty.

28590339194_10b183c8ec_o

So many new walls to decorate.

29169971636_819b057579_o

My new commute.


Peach Champagne Float

We toasted our new abode with a pickleback when we hosted our first guests, but I thought I would share the drink that we actually made on the night before the movers came. I like to picture myself drinking this while sitting on a warm beach with my toes in the sand, watching the sun set over the water. Sadly reality doesn’t often match our dreams, but close your eyes and you can imagine along with me.

Making sorbet with alcohol is a great way to ensure it will have a great texture while also adding another dimension of flavor. We had a bunch of ripe peaches and decided to mix them up with some jalapeno-infused tequila because we are geniuses…although Alton Brown gets the credit for inspiring us with his Black Pepper Mango Sorbet.

Peach Jalapeno Tequila Sorbet

  • Eight ripe peaches
  • 1/4 cup fresh lime juice
  • 1/4ish cup jalapeno tequila
  • 12 oz sugar

Peel and slice the peaches. Puree the slices in a food processor until smooth. Add the rest of the ingredients and pulse to combine. Strain through a fine mesh strainer and chill for at least four hours.

Process the puree in an ice cream machine according to the machine’s instructions. Ours took about twenty minutes to get to the right consistency. Put the sorbet into a freezer-safe container and freeze for three hours or overnight before serving.

The sorbet tasted amazing on its own, but also got my mind turning for possible cocktail options. I made a few really excellent margaritas with a scoop floating on top, but the night before moving we needed something simple: champagne floats! Once the sorbet melts a little, the mixture of bubbles and peach/pepper/tequila flavors calmed our nerves just a bit and reminded us of a time when we had time to make sorbet. This float would make just as good a party drink as it made a moving drink–so dig up an ice cream maker and pop some bottles!

  • 4 oz. champagne or other bubbly wine of your choice
  • Generous scoop of sorbet

Champagne Floats : Hooch & Home

Float the sorbet on the champagne and garnish as desired. Toast to your great success, no matter the outcome!

Posted in Uncategorized | Leave a comment

Seize the Strawberry!

I can say with some certainty that every book that I have read that is primarily about canning starts with the story of the author’s first strawberry jam. My canning story is much the same: take a slightly ambitious impulse purchase at the farmer’s market, add a few free hours on a weekend day and next thing you know, I’m trying to lift hot jars out of boiling water with tongs (and scalding myself.)

There’s some quality particular to the strawberry that seems to create a straight line from gallon bucket to sealed jar. For me, it’s all about not letting go–wanting to hold on to the flavor, the smell, the season. Fresh, ripe strawberries from the farm stand or the pick-your-own field are so supremely superior to the chilly, gigantic supermarket strawberry that I find myself, year after year, compelled to preserve a few jars and eat my fill along the way. When contemplating that gallon bucket, I face the possibility that I will have wasted my last opportunity to taste that ephemeral joy until next spring.

I may be a bit dramatic when it comes to food.

no regrets chicken

A few notes on strawberry jam:

  • Strawberries have enough pectin in them to not require adding any and adding more sugar only changes the flavor, not its preserved-ness. Keep in mind that I don’t have a problem with cooking my jams a little longer to achieve a sturdy gel, so if you’re looking for a barely cooked fruit jam, pectin will be the way for you to go.
  • Heed my advice: do not cook strawberry jam in a tall pot, it will overflow! Using a saute or preserving pan helps with jam making in a lot of different ways and with strawberry jam, it allows the foam room to spread out instead of up!
  • There are loads of different spins you can put on the recipe. I made one version from Saving the Season where you cook the whole thing in the oven and add some rosé at the very end.

Strawberry Jam

Ingredients and materials needed

  • 1 gallon of strawberries
  • 1 to 2 tbsp lemon juice
  • 1 to 2 cups sugar
  • Saute or preserving pan
  • Jars, new lids, rings, a large pot for a water bath, any other canning tools you might prefer (jar lifter, funnel, etc.)

To begin, find yourself about a gallon of the best strawberries available. Like, able to smell them across the room best strawberries. Next, remove the leafy tops and slice them to a reasonable size for canning. I tend to err on the side of smaller for my slices because it makes the cooking process go a little quicker.

strawberry jam : hooch & home

You can immediately proceed from cut strawberries to cooking on the stove, but I like to take a few hours to allow the strawberries to macerate with some sugar in the refrigerator. So, mix the sliced strawberries (which should be about six to eight cups’ worth if you start with a gallon) with between one and two cups of sugar. As I said earlier, this is just the amount that I prefer–not what is necessary for preservation purposes. Not too sweet, still very much a jam. Either allow this mixture to sit in the refrigerator for several hours or proceed directly to the cooking stage.

Just before you are ready to begin cooking the jam, prepare your jars, lids, and rings for canning. Lots of information about sterilization and proper precautions can be found on the Ball website and elsewhere on the internet, even this very website! Once you are ready to begin cooking, add the strawberry-sugar mixture to a pan over medium to medium-high heat. Also add a tablespoon of lemon juice to help the flavors pop a bit.

I have also tried a recipe in which the strawberries are cooked over high heat in an effort to get all the water out of the berries ASAP and decrease cooking time. It was a stressful mess, so I tend to stick with the slow-and-steady mindset. Another option is to strain the juice off the macerated strawberries and begin cooking that down without the fruit added in, to decrease the amount of time the berries spend cooking. I believe I saw that approach in the book Canning for a New Generation, which I highly recommend for all kinds of canning purposes.

Cooking the jam:

strawberry jam : hooch and home strawberry jam : hooch and homestrawberry jam : hooch and home strawberry jam : hooch and homestrawberry jam : hooch and home

Step One: Warming the berries and juice.


Step Two: Foam begins to form.


Step Three: Berries begin to break down and foam continues.


Step Four: Foam subsides and gel begins to form.


Step Five: Get a plate in the freezer to start testing your gel!


Throughout this process, you will need to stir quite frequently, especially as you get close to the end. I like to have my jars hanging out in some very warm water (after sterilizing them) so they’re all set for filling once the time comes.

Once you’ve made jam a few times, you’ll get to know when your gel turns the corner from sauce to jam just by sight and feel. Until you get to that point and even after you do, you will probably want to test your jam with the cold plate test: place a small plate in the freezer about ten minutes before you want to test, place a small amount of jam on the plate, put the plate back in the freezer for one minute, and then remove the plate and invert it to test how quickly the jam runs. Definitely give it a taste at this point as well! I have only ever undercooked a jam, so don’t worry about missing a magic window of time or anything like that. Thicker will almost always be better.

<a href="https://hoochandhome.wordpress.com/wp-content/uploads/2016/06/image4.jpeg"><img class="wp-image-1492 size-medium alignleft" src="https://hoochandhome.wordpress.com/wp-content/uploads/2016/06/image4.jpeg?w=300" alt="strawberry jam : hooch and home" width="300" height="300" /></a>

Fill your jars, leaving 1/4″ to 1/2″ of headspace. Process the jars for five minutes in boiling water and remove to rest and cool on a kitchen towel. Any jars that haven’t sealed after cooling completely should be refrigerated immediately and consumed within about a month.

I have found that about a gallon of strawberries yields about four half-pints or two pints of jam. Half-pints make good gifts, but I prefer full pints in my refrigerator!


Strawberry Mojito

Making jam is long, hot work and this is the perfect beverage to cool you off after you put up a batch or two. I made it with jam, but fresh strawberries would work equally well–if not better!

  • 2 oz white rum (I use Bacardi)
  • 1 tbsp strawberry jam or several slices of fresh strawberry
  • 4 mint leaves, extra for garnish
  • 1 tsp simple syrup
  • 1 oz lime juice
  • 5 oz club soda or seltzer

Muddle the mint leaves with the simple syrup, adding the strawberries once the mint has broken down a bit. Add the rum and lime juice and shake over ice. Pour the mixture into a glass and add the soda and a fresh ice cube or two. Garnish with a sprig of mint.

strawberry mojito : hooch and home

Posted in Uncategorized | 1 Comment

Preparing for Peaches

No matter where you are in the US, things are confusing right now. And while you may need to worry about who our next president will be, or whether you should take your summer clothes out of storage early or not, you can always count on the power of the peach to bring a smile to your face.

Just look at them. You can almost smell them they look so good. Wishing you had some peaches right now? If you read Melissa’s post on peaches this August than you may have some chillin in a dark place right now, ready to be eaten. But, if you are peachless, have no fear! Read on and prepare for the bounty we know summer will bring so that next winter you will be able to enjoy these jewels during your next snow storm or cold and rainy day.

A quick note on canning: canning is very easy and you should not be afraid of it!!! However, it is important to be careful and to be smart when canning. Ball Jar’s site has a wonderful explanation of how to safely can. Don’t forget: when it doubt throw it out!

91c3f7d1-acf3-488b-a40c-8edb87360c7b-1

Peaches In Lavender Syrup (from Saving the Season)

What you will need:

  • 8 lbs of ripe peaches
  • 8 cups of water
  • 4 cups of sugar
  • 2 stems of lavender
  • paring knife
  • mason jars
  • fresh lids
  • canning pot (any tall stock pot will do)
  • Tongs meant to handle hot jars
  • jar rings

What to do:

  • READ UP ON PROPER CANNING TECHNIQUES!!! 
  • Place jars in canning pot, cover with water and simmer
  • Blanch peaches in batches in a pot of boiling water for 1 min
  • While peaches cool, boil water, sugar and lavender in large pot
  • When peaches are cool enough to touch, peel and cut in half using paring knife and remove pits
  • Save skins and any liquid peaches release while they are sitting and waiting in a bowl to be canned (see below for what to do with these!)
  • Remove jars from water and pack with peach halves seed side down (about three or four per jar)
  • Ladle syrup over peaches until almost covered
  • Tap jars to settle peaches and syrup and then fill jar with syrup (leave 1/2 inch of headspace)
  • Seal jars and process in boiling water bath for 30 minutes
  • When cool, remove rings and place jars in a cool place
  • On a snowy day, eat over vanilla ice cream and remember, summer is also coming 🙂


Here at Hooch & Home we take Benjamin Franklin’s advice to “waste not want not” very seriously. The thought of composting those gorgeous peach peels was too painful so I figured it was time to experiment.

Benjamin Franklin’s Peach Liqueur 

What you will need:

  • Leftover peach peels and peach juice from canning peaches
  • 500 ml of vodka
  • 2 cups sugar
  • 1.5 cups water

What to do:

  • Combine vodka and peach leftovers in a sealable jar
  • Let leftovers sit in vodka for 30 days
  • Strain vodka into another sealable jar
  • Combine water and sugar in small pot and heat until combined to make simple syrup
  • Once cooled add simple syrup to peach infusion
  • Let sit in dark corner for 30 days


There are so many delicious drinks that you can make with this liqueur but my favorite thing so far has been various mixing with Campari. The peachy sweetness is a perfect balance for the bitter flavor of the Campari. Below I mixed 1 oz of Campari, 1 oz of peach liqueur, 1 oz of gin and 1 oz of lemon juice. We pretended it was summer even though we were snuggled under blankets!

Tonight I used it to make a peachy negroni. I simply substituted peach liqueur for gin and kept the 1:1:1 proportions. The drink was sweet and the perfect thing to sip as I slip deeper into my denial about the cold weather that we are having.

IMG_6830

Can’t wait till peaches are back in season!!!!!

Posted in Uncategorized | 2 Comments

Repotting Plants and a Spring Wind

Recent cold snap notwithstanding, spring has definitely arrived here in South Carolina and it looks like we’re going to get a few weeks to enjoy it before summer temperatures start creeping in. For many years, spring has been a time to plan for growing things and, although we don’t currently have the capacity to garden or really grow any food beyond herbs, I still take the time to pay some attention to my house plants and their growth. Many house plants will go through a growth spurt in the spring, so early in the season is the perfect time to repot them in preparation for the new growth.


Repotting Plants

Repotting container plants is an essential part of their care, in addition to regular watering and fertilization, and usually only needs to be done on an annual-ish basis. As plants grow and age, they deplete nutrients from the soil and mineral salts can build up in their stead. Refreshing the soil is a big part of why repotting is necessary, but giving plants more room to grow is just as important a reason. Quick-growing plants can become pot-bound, which means that the roots don’t have enough room to spread throughout the pot, instead circling around the root ball or poking out through drainage holes. This PennState Extension page has a lot of good information about repotting, how to determine if your plant is pot-bound, and what to do if it is. Quick shout out to agricultural extension agencies: you’re the best.

Hooch & Home : Repotting Plants

Since I can’t have pets, I have plants.

I have a lot of plants, so the first step for my repotting adventures is to strategize my pot plan and pre-water the plants. Because several of my plants are all about the same size, I needed to pick up some 10″ pots and some new potting soil before getting down to business. Luckily, several of my plants are also a size smaller than those, so I was able to reuse several pots as well. When choosing pot sizes, you first need to decide if you want the plant to grow larger. If you do, the pot should be just the next size up–you don’t want to scale up too far!

Hooch & Home : Repotting Plants

This is a Christmas cactus that is one of many descendants of the Audrey II of Christmas cacti. I am very proud that I have not only kept it alive, but that it blossomed for the first time about a month ago. Seriously though, this plant’s mom is e-nor-mous.

Anyhow, the second step is to prepare your new pot by adding enough soil that the plant will be level with the lip of the pot. Many people put a coffee filter or newspaper in the bottom to keep soil from falling out, but I don’t bother.

The third step involves an occasionally harrowing dance of tipping the plant upside down, while also trying to pull it from its pot. Brush some of the excess soil away from the root ball and inspect for any sickness. If the plant is pot-bound, you may need to cut away some of the roots to ensure a healthy future. Check out the extension page above for more info on this step in particular.

Hooch & Home : Repotting PlantsPlace the plant into its new pot, trying as best you can to center it. All that’s left to do now is to fill in the area around the root ball with new soil and pat it down a bit to make sure the root ball is stable. Oh, and give everyone a thorough watering to help them settle in to their new digs.

Hooch & Home : Repotting Plants

That plant on the right is so much happier in its new pot. It’s always surprising to me how different my plants look after repotting, like I can’t even fathom how they lived in such small pots after seeing them in their new homes.

Make sure to keep an eye on everyone in the days after repotting. That kind of trauma can be too much for some, but hopefully everyone settles in and gets back to the important work of growing.


Spring Wind

While spring has definitely arrived, she has brought with her some stiff winds that simultaneously make my apartment feel fresh and clean while also blowing in massive amounts of pollen. Alas. Since the temperatures haven’t quite warmed up to the point that I’m busting out the gin and tonic, I thought I’d experiment with some spring flavors in this warming, yet refreshing bourbon cocktail.

  • 2 oz. whiskey or bourbon
  • 0.5-1 oz. ginger liqueur
  • 4 oz. lemonade
  • Sprig of thyme to garnish

Combine the ingredients over ice, stir, garnish, and enjoy. If you are a big fan of thyme, muddle some in with the ginger liqueur or just bruise a few leaves between your fingers to get that flavor.

Hooch Home : Spring Wind


Posted in Bourbon, Cocktails, Easy Update, outdoors | Tagged , , , | Leave a comment

Upcycling Cashmere and A Versatile Cocktail

This whole process started with a bit of absentmindedness after the whirlwind that was my Christmas holiday. I just so happen to like to bring my slippers with me whenever we head home to visit family for reasons of comfort and more comfort, but this time, they did not make the trip back South. My mom happened upon them and they happened upon her feet and then I happened to need some new slippers.

Cue the sound of my DIY, cheapskate brain: “Hey, I bet I could make some.” After some tentative googling and a few browses of Pinterest, I found this tutorial for making slippers out of a felted sweater. I remembered that Rob had a tragically moth-eaten cashmere sweater that he would willingly donate to the slippers cause and I headed to Goodwill to see if I could find any other wool to experiment on. Lo and behold, I found two more 100% cashmere sweaters for $5 each, and I walked away happy.


Felting Wool on Purpose

I know that while most of us have shrunk a beloved sweater on accident at least once, fewer of us have tried to do it on purpose. The process certainly isn’t complicated, but there are some tips to be offered!

Hooch & Home: Felting Wool

  1. Obtain your wool. In order to get the best result from your felting process, the sweater or other garment needs to be as much natural fiber as possible. 100% is best. Check the tags!
  2. Put your sweaters into a large lingerie bag or pillowcase. All I had was a king size pillowcase, but it worked really well to contain the renegade wool bits that the sweaters shed.
  3. Hooch & Home: Felting WoolWash the sweaters in hot water with laundry detergent. This is when the magic happens. Although agitation alone is enough to felt wool, the hot water and soap help the process along as well. If you don’t have access to a washing machine, this process can be done on in hot water on the stove…but that’s a little much even for me.
  4. When the cycle has finished, retrieve your sweaters from their case and inspect the result. The fibers should have shrunk considerably, although probably not far enough. I had to wash my sweaters three to four times before they were adequately felted. If you have access to a dryer, running the sweaters through a cycle will help speed up the process as well.
  5. When trying to decide if the wool has felted enough, test the fabric by pulling it and inspect the fibers. It shouldn’t stretch much and you shouldn’t be able to see the individual lines of knit wool. If felted enough, the fibers should have matted together to create your new fabric.

Once your wool is all felted up, it is ready to be put to all kinds of uses. My library has at least one whole shelf of books on felt crafts and ideas, so if slippers aren’t something you need, do some investigating and find something you do need or want. Although I must say, cashmere felt slippers are kind of awesome.

Hooch & Home : Felt on Purpose

Please excuse the haphazard hand sewing.


A Hooch & Home Bloody Mary

Felt is an incredibly versatile fabric, especially when you make it yourself….much like the Bloody Mary. I’m not a huge fan of the drink when made with its traditional vodka, but! part of what I do love about it is that you can make the cocktail with just about any base spirit. Except maybe whiskey. I mean…I’d be willing to try it.

Anyway, I love making Bloody Marys at home because there’s so much you can do to make this a fabulous drink that you love, without fear of messing up ratios or delicate balances–and you don’t even have to have bacon. And you can stay in your pajamas!

Hooch & Home : Felt on Purpose

I tend to stick to this basic recipe:

  • 3 oz. base spirit. Aquavit is my hands down, no contest favorite. Gin used to be, but I’ve converted.
  • 5-6 oz. tomato juice
  • a little salt, whether in the form of soy sauce or actual Kosher salt
  • a grind or two of black pepper
  • a hefty splash of some kind of pickle brine
  • a couple of dashes of some kind of hot sauce. Sriracha or Frank’s work well if Tobasco isn’t your jam.

Stir or shake until very cold, serving over fresh ice. Garnish with olives, pickled okra, dilly beans, celery, etc.

If the flavor is a bit thin, which is often my complaint, Worchestershire sauce usually solves the problem. If things are a little dull, add some lemon juice. Sometimes the tomato juice is acidic enough without lemon. And do not underestimate the importance of the added salt. Tomatoes have certain flavor compounds that are only unlocked in the presence of salt and alcohol, which is also helpful to keep in mind when cooking with tomatoes.

There are tons and tons of different combinations that work well with tomato juice and booze. Don’t be afraid to play around and see what makes you happy!

Posted in Uncategorized | Leave a comment

Fusion

Hello Hoochers and Homers!!!! It’s been a little over two months since we last hooched and homed.  We’ve been occupied by weddings, graduations, trips, job searches, Netflix binges and generally trying to regain balance in our lives.  It’s taken an epic snowstorm, but sheltering in place is apparently just what I needed to get back to H&H.


Fuse Beads

This wintery weather is is the perfect time for a fun indoor project that is fun to do solo or in groups. Fuse beads bring back memories of camp, are easy to use, and sure to be a crowd pleaser. Like most of you, I had completely forgotten about fuse beads until my friend Shira, who I highly recommend if you are looking for a wedding photographer, brought them out while we lingered after a delectable brunch in her amazing South Philly apartment.

d5ec62b8-3aa2-4ace-8cb4-734481565212

What you’ll need:

  • Peg board (about 8 bucks on Amazon)
  • Fuse Beads (11 bucks on Amazon)
  • Clothing Iron
  • Parchment paper

c7c83f52-9841-4cfa-8064-84677507a90c

This project is simplicity itself. You create your design on a peg board. The sky is the limit!

Processed with VSCOcam with m5 preset

Next you put a layer of parchment paper on top of the beads and gently begin rub an iron back and forth over it. You’ll want to do this gently for a few minutes to make sure that the beads begin to fuse, but not for so long that they start to wilt and get too melty. If you are new to this it’s ok to keep checking and then continuing if need be. Then flip the peg board over so that the parchment paper is now between the beads and the table. Remove the peg board and fold the parchment paper over the exposed side of the design. Repeat ironing for another few minutes again being careful not to melt your design too much.

e2071eda-a547-46b9-87c8-1099707459f7

Allow design to cool. Once your design has cooled you can turn your fuse beads into anything.

Continue reading

Posted in Uncategorized | Leave a comment

DIY Dinner Life

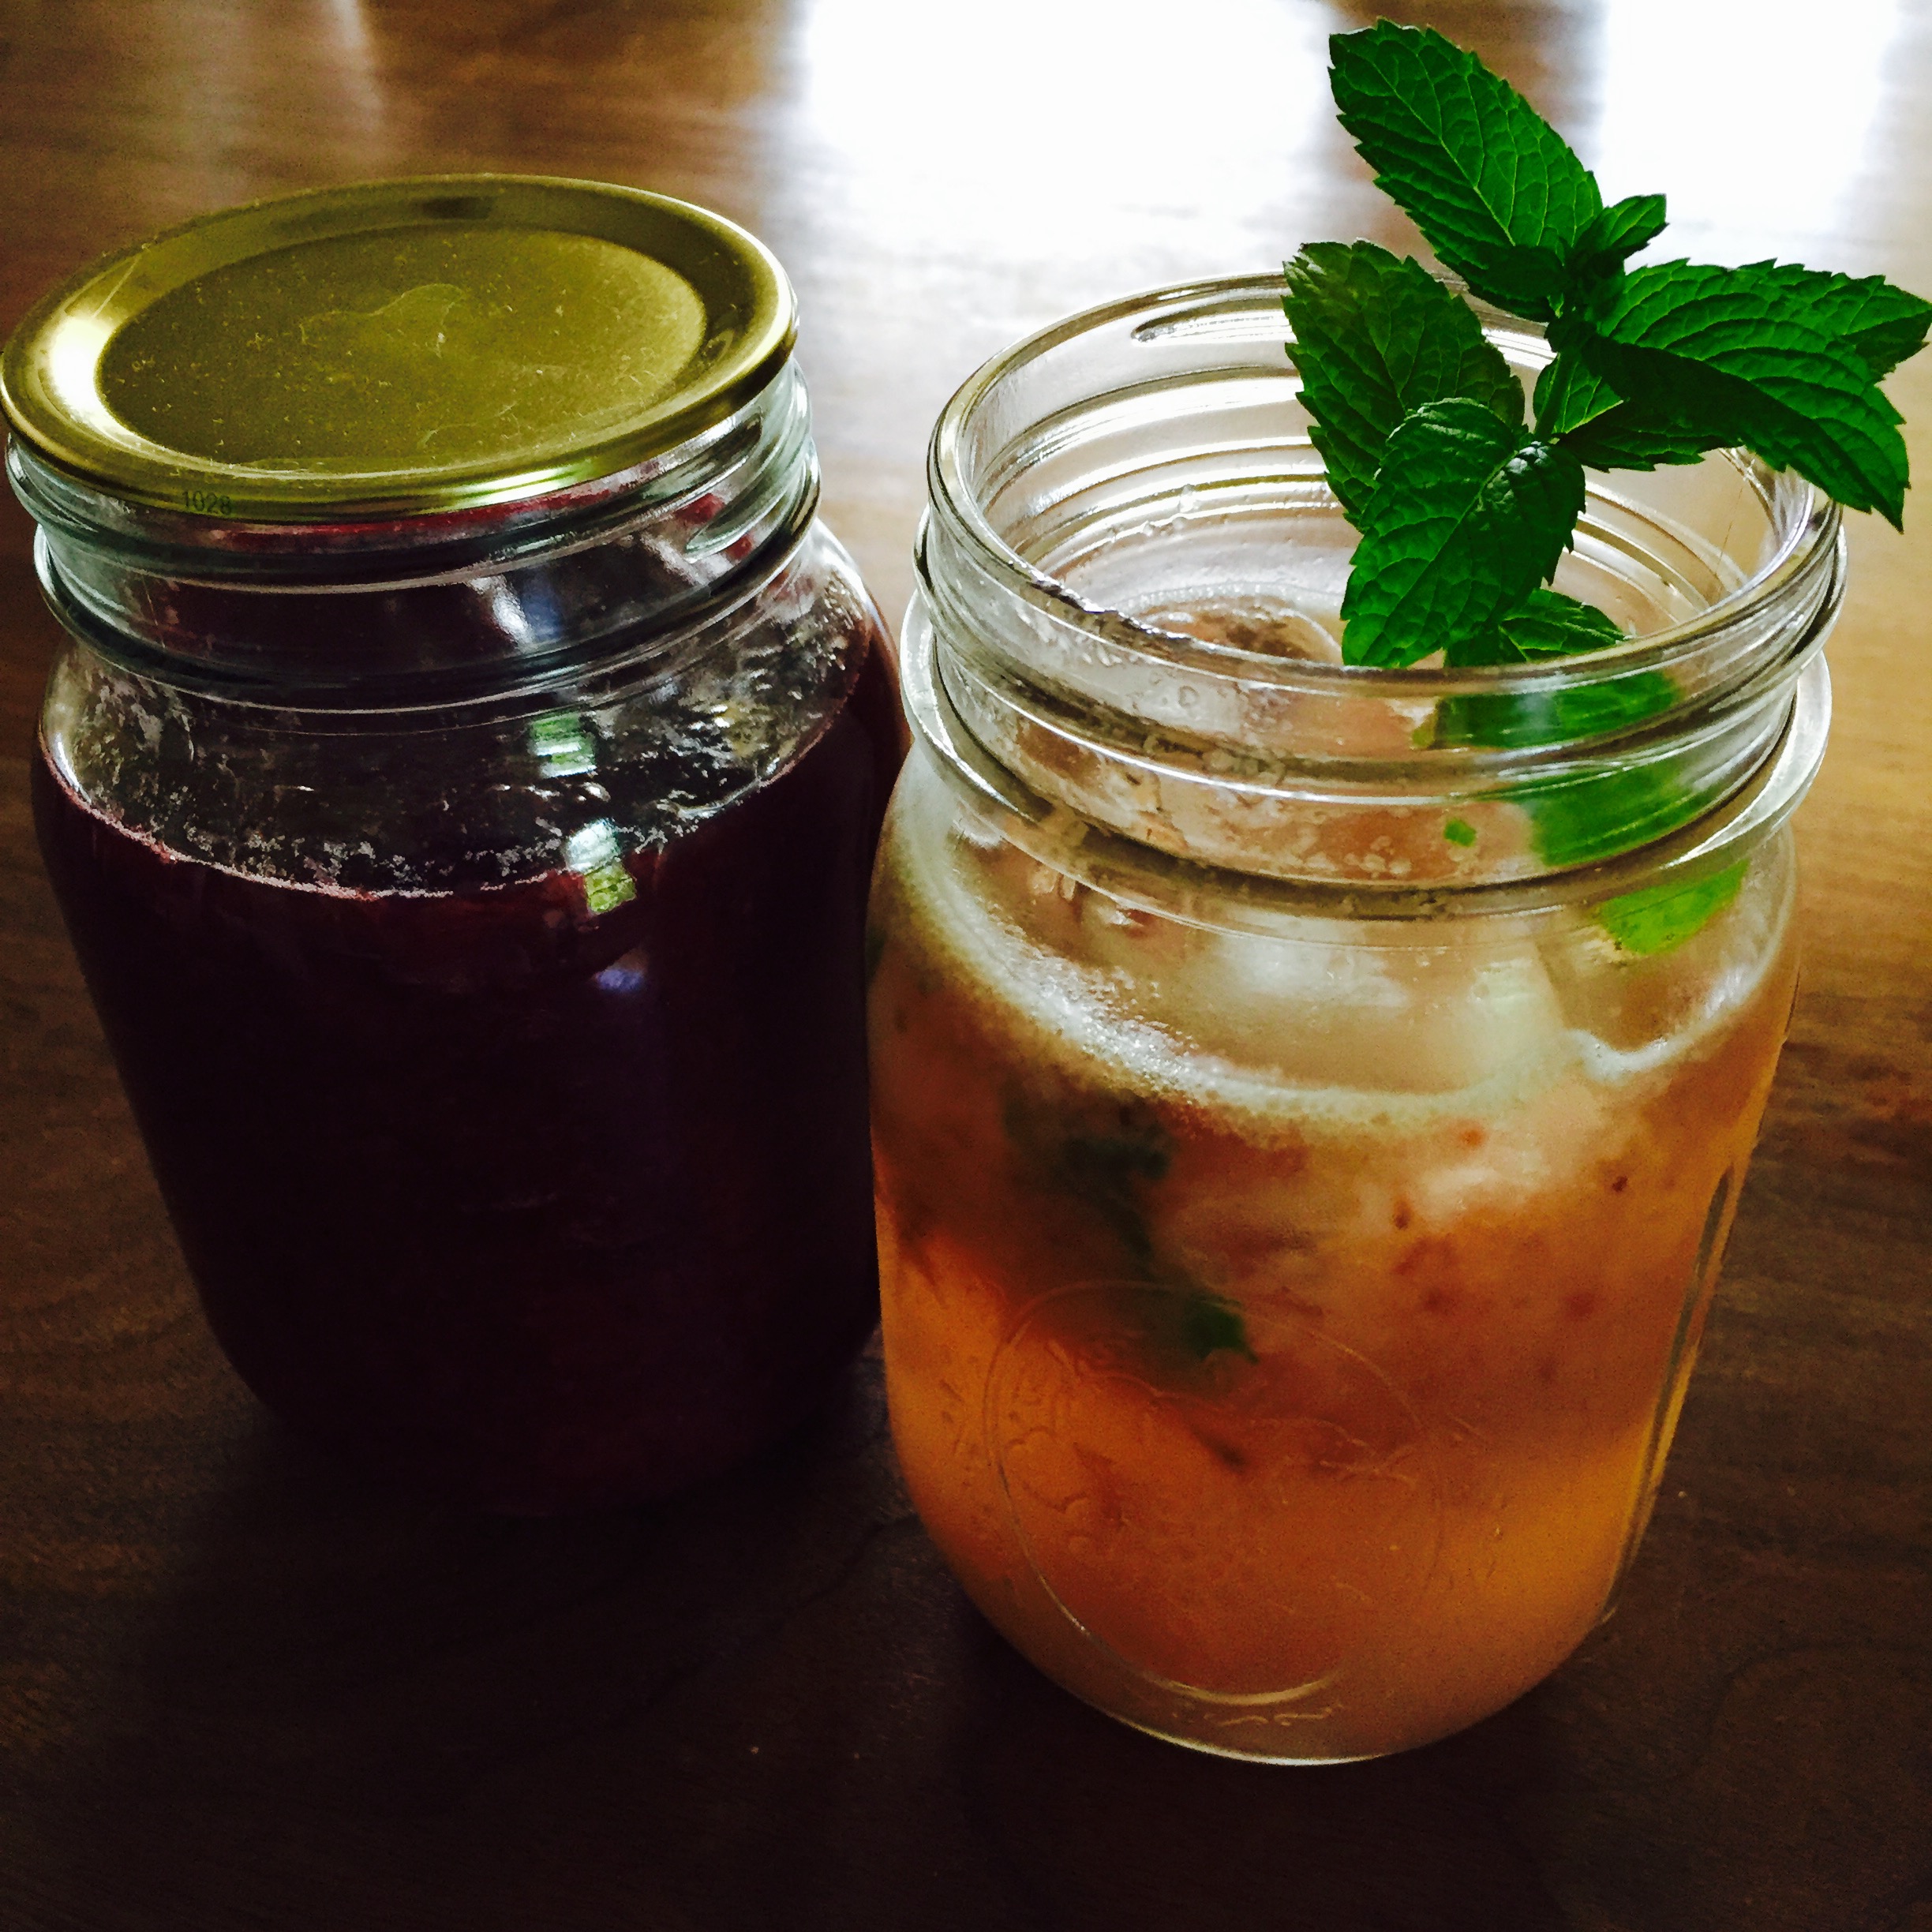
I’m taking a brief break in my graduate school-induced hiatus from this here blog as a way to procrastinate on some major assignments that are due this week. Because graduate school! I’m graduating in LESS THAN FOUR WEEKS and then my brain will have room for crafting and home projects and cocktails once again.

Anyway, my life is mostly taken up by reading, writing, and thinking about what I’m going to eat and drink next, so I thought I might share some of my favorite recipes. Especially those that are #1 appropriate for winter times and #2 really excellent substitutes for eating out. One of the top reasons we are able to live as cheaply as we do is that we very rarely go out to eat (2x/month, if we’re doing well). One of the top reasons my cravings are still satisfied is that we make lots of international food. Also, we live in a small town, have few friends, and actually love cooking. Both of us! YMMV, obvi. I think if we lived somewhere that had more to offer culinarily-speaking, it would be more difficult to stay in as much as we do. This kind of lifestyle takes a lot of effort, but it works for us partly because we still eat fantastic food, have gotten used to the effort and planning ahead, and over time we have been able to see how much we save as a result.

Oh! Also, most of this happens to be vegetarian, if not vegan.

Indian: Lentil Tikka Masala from Naturally Ella

I’m actually on a quest to find the perfect chana masala recipe, but this one is a really excellent tikka masala. The first time we made it, we made a bunch of adjustments by accident: using an entire can of coconut milk instead of just a cup, using all of the masala paste we made instead of 1/3 cup, using a can of crushed tomatoes instead of 1 cup of stewed. Love you, Naturally Ella, but I really don’t want to open a can just to only use half. I always want more tomatoes. It is a spicy dish when you use all of the masala paste, but it is wonderfully warming and satisfying when served over rice or with chapati. Toasting and grinding whole spices is really worth it for this recipe.

Veggie burger: Olive Lentil Burger from Post Punk Kitchen

I love it when we have veggie burgers on hand because they satisfy my burger/fast food cravings and can be extra delicious. We’ve tried a lot of different recipes and I think there’s a chickpea burger out there somewhere that is also a winner, but I distinctly remember loving these. They’re very handy for camping days and I always wish we had made more. Roast up some potatoes and you’re all kinds of set.

Comfort food: Mushroom Bourguignon from Smitten Kitchen

I recently made this as a YAY I LOVE FALL dish and it was absolutely fantastic. I did make an adjustment to increase the broth quantity (beef is excellent, good quality veg will do) and add a cup of lentils to cook along with the sauce. Because apparently all we eat is lentils! I swear I haven’t had lentils in like a week. Anywho–the butter/flour/fork magic she details at the end is actual magic.

Broccoli is on sale: Roy Finamore’s Broccoli Cooked Forever from Food52

We’ve made this a couple of times now and I’m always so pleased. Basically you’re making broccoli confit and you best have some delicious bread or fancy crackers on hand for eating time. It takes a while, but it is the perfect dish for a cold and rainy weekend afternoon.

Smoky, tomato-y Italian: Tagliatelle con i Ceci

Tagliatelle con i Ceci

I found this video while searching for a copycat recipe for a soup we had in Perugia when we were there last spring. The video and the man who made it are an excellent example of just about everything I love about Italy. He measures tomato puree with an espresso cup! For those who have no Italian, this recipe from Food52 comes pretty close to the mark. Only difference is that we add a bit of bacon and don’t puree the chickpeas. Without the puree step, the recipe is more like soup, which we like. It’s top notch comfort food that takes very little time or effort.

Mexican: Spicy, Citrusy Black Beans from Simply Recipes

We found this recipe ages ago and have made it at least once a month since. It’s a great way to use dried beans and we eat them in tacos or over rice, with all the toppings. Is very good.

N.B. about dealing with dried beans: see this explanation for why we brine our beans when we soak them. We usually do two cups of dried beans at a time, soaked in two quarts of water and 1 1/2 tbsps of Kosher salt for about eight hours. We set the beans to soak in the morning and then cook them at night, rather than any kind of overnight wrangling.

Bonus MexicanSecret Ingredient Refried Beans

So this recipe is actually embedded in a recipe for sweet potato and refried beans burritos, but since I’m not the world’s biggest sweet potato fan, we tend to just make the beans portion. Of course we make the recipe using dried beans we’ve cooked up ourselves, but canned works too! Spoiler alert: the secret ingredients are soy sauce and mustard. We’ve used these to make homemade crunch wrap supremes (because sometimes fast food cravings crawl up into my brain and won’t leave) and also fantastic bean dip.

Asian Noodles: Dan Dan Noodles from Alton Brown

Once I had mastered this recipe, I began to riff on versions of Asian-flavored dressings + noodles + veg = ❤ but this recipe gives you a good place to start. Ramen is a handy noodle because it is ubiquitous and cheap, but we tend to go for rice or soba/udon noodles now. When I make dressings or sauces like this, I tend to use the same theories I keep in mind when I make salad dressing: vinegar (rice), sweetener (honey), salt (soy sauce and/or miso paste), mustard, aromatics (garlic and ginger), and oil (usually a combo of olive, sesame, and chili).


Beverages

As mentioned above, I am finishing up my graduate degree and my brain can only do so many complicated things and cocktail decisions have fallen to the bottom of the list. That fact, combined with the fact that it has been Oktoberfest beer season, beer has been my go to beverage lately. And, since we’ve never really talked about beer on yon blog, I thought this might be a nice chance to share some of my favorites, aka what I would buy if I had the money. Many of these are regional to the South, but may be obtainable beyond the Mason-Dixon line.

Westbrook One Claw: Charleston, SC

This is a rye IPA and essentially a grapefruit in a can, but without the sweetness of other gross grapefruit-y beers. It was one of my gateway IPAs and I’m super not mad about it. Also, most other beers put out by Westbrook are pretty stellar.

Melissa loves Dale's

Hello! says the kitchen chicken.

Oskar Blues Dale’s Pale Ale: Brevard, NC

I like a lot of what Oskar Blues puts out, but their pale ale is a solid brew. I also give high marks to their Pinner Throwback IPA. Also, they just so happen to be located in an extremely convenient spot for stopping in their tap room after a hike on the Blue Ridge. If you’re ever in the area, it’s well worth an hour or two of your time.

Avery Brewing Ellie’s Brown Ale: Boulder, CO

I’m a big fan of brown and red ales, especially in the fall and winter, and I’ve seen this one in some widespread locales. Bonus points: the chocolate lab it’s named after is on the can.

Thomas Creek River Falls Red Ale: Greenville, SC

Greenville brewing ventures benefit from the town’s proximity to Asheville’s many excellent offerings and Thomas Creek is no exception. Like I said, I love a red ale. We had another truly exceptional red ale a few weeks ago in a make-your-own six pack, but I can’t remember the name or brewery :(((

That Mexican Hot Chocolate Stout that RJ Rockers won’t be selling commercially: Spartanburg, SC

A few weeks ago, I tasted a mere half pint of this ambrosia, which was brewed specifically for an event in town. It was the perfect blend of bitter and smoky and spicy, with only the barest sweetness. Sadly, I have a feeling this will be one of those things that I only had a few tastes of, but will remain seared upon my memory for years to come. Just like that single bite of mascarpone gelato I had nine years ago.


With all of that said, go forth and cook! And drink! And let us know your favorite recipes/brews if you feel so inclined!

Posted in Food | Tagged , , , | Leave a comment

The Swinging Bachelorette

It’s been a while and we missed you. Please pardon our absence from the blogosphere these past few months. Things have been a little…hectic. And when not running around, planning parties or working, I’ve been indulging  in an unquenchable Gilmore Girls binge. It seems the only cure is to run out of episodes. But I digress. The party planning has been due to my sister’s upcoming wedding and it has given me an excuse to craft homemade party favors, try out new cocktails, and spend a lot of time with some fabulous women, including Melissa! Spending time with her in person was a fall highlight; we even found a geocache in the middle of the woods!

IMG_5678

Planning something like a bachelorette party is no easy feat, but with Melissa’s help I was able to plan a weekend that both made my sister happy and stayed true to our Hooch & Home sensibilities (homemade and affordable in case you forgot). We went hiking, toured the Vanderbilt Mansion in Hyde Park, stayed in a kick ass mansion on the Hudson, cooked dinners and enjoyed cocktails and got our last big fix of rosé for the season.
IMG_5642

And of course we needed party favors. When it comes to party favors I really believe in providing something useful, and for our relaxing girls weekend it seemed like something that pampered would fit the bill. Homemade body scrub is easy to make, affordable to make in large quantities and even better than the store bought stuff. As winter approaches, I highly recommend whipping up a batch of this and keeping it in the shower. It’s also great as a gift. In keeping with the ball jar theme we also did a fun craft resulting in a useful water bottle, and created a special cocktail just for the bride to be.


DIY Body Scrubball jar

What you will need:

  • Glass jar – I used a wide mouth short ball jar (as pictured).
  • Plastic lid for jar that won’t rust in the shower (as pictured)spin_prod_859594212
  • Salt – you can use Kosher salt or buy a more finely ground salt for a less intense scrub – no need to get fancy as table salt will do!
  • Oil – olive oil is amazing but you can play around with different options to see what works best for your skin
  • Essential oil of your choice (I love a citrus based one)

Instructions:

  • Fill jar halfway with salt.
  • Add oil until about 3/4 of the jar is full.
  • Add 1/2 tsp of essential oil of your choice, or more for a stronger scent. Remember, you can add but you can’t subtract.
  • Mix until oil and salt are fully combined. You will probably need to add more oil as the salt gets mixed in. You want to add enough oil so that all of the salt is  held together but not so much that the salt is swimming in it.

IMG_0098

The great thing about this project is that it’s really about your preferences and how you like your scrub. You can always add more oil or more salt until you find the right balance.

IMG_0100


DIY Water Bottles

Anyone who has been to my house knows that I love glass jars.  Tall ones, short ones, fat ones, and tiny ones.  I love them all. It began with my first read through of Food In Jars by Marisa McCellan. I had no idea glass jars were so versatile. You can keep anything in them! They are also way better for us and the planet than anything plastic, and then there is the whole canning thing. Maybe I have a problem…You can imagine my delight when I discovered that there are companies making special lids just for jars so that they fill even more of my vessel needs. I picked up enough of reCap’s wide mouth lids for all the ladies at the party, and the tall wide mouth jars that hold lots of water but still fit in cup holder.  That and some acrylic paint and we had ourselves a Saturday night craft project.

IMG_0086

What you will need:61ehz4-iraL._SL1200_

  • Acrylic paint
  • Acrylic paint brushes
  • Painters tape
  • Jar of your choice
  • reCap lid (as pictured and purchased on Amazon)
  • Oven

IMG_0080

How to do it:

  • If you want to keep some of the jar to remain clear, use painter’s tape to create a design or pattern. You can also use a stencil. Ulive has a great video with instructions.
  • Apply thin layers of acrylic paint to your jar in desired design.
  • After first layer has dried, add another layer if desired. It depends on how opaque you would like your design to be. If it looks streaky add another layer.
  • Place jars in cold oven.
  • Set oven to 375 and set a timer for 30 minutes. After 30 minutes turn off the oven and let the glasses cool with the oven.
  • Screw on lid and enjoy!

IMG_0088


The Balancelle 

One of my sister’s favorite cocktails is called A Porch Swing. Smitten Kitchen has a great version of it here. For a celebratory twist we adapted this cocktail by switching out Sprite with Champagne. We appropriately upgraded the name by translating it to French!

Ingredients for one cocktail:

  • 1.5 oz of Gin
  • 1.5 oz Pimm’s No. 1 liqueur
  • 4 oz  lemonade
  • Champagne or other bubbly (we used prosecco)
  • 5  thin slices of cucumber

When making individual drinks pour gin, Pimms and lemonade over ice in a tall thin glass. Fill to top with champagne. Garnish with cucumber.

Ingredients for a pitcher:

  • 2 parts Pimms
  • 3 parts gin
  • 8 parts lemonade
  • Champagne to taste
  • Cucumber

Mix ingredients in a pitcher. Stir with ice. Drink neat or with ice. Garnish with cucumber slices.

IMG_0064

IMG_0066

Posted in Uncategorized | Leave a comment