Hello Hoochers and Homers!!!! It’s been a little over two months since we last hooched and homed. We’ve been occupied by weddings, graduations, trips, job searches, Netflix binges and generally trying to regain balance in our lives. It’s taken an epic snowstorm, but sheltering in place is apparently just what I needed to get back to H&H.
Fuse Beads
This wintery weather is is the perfect time for a fun indoor project that is fun to do solo or in groups. Fuse beads bring back memories of camp, are easy to use, and sure to be a crowd pleaser. Like most of you, I had completely forgotten about fuse beads until my friend Shira, who I highly recommend if you are looking for a wedding photographer, brought them out while we lingered after a delectable brunch in her amazing South Philly apartment.

What you’ll need:
- Peg board (about 8 bucks on Amazon)
- Fuse Beads (11 bucks on Amazon)
- Clothing Iron
- Parchment paper

This project is simplicity itself. You create your design on a peg board. The sky is the limit!
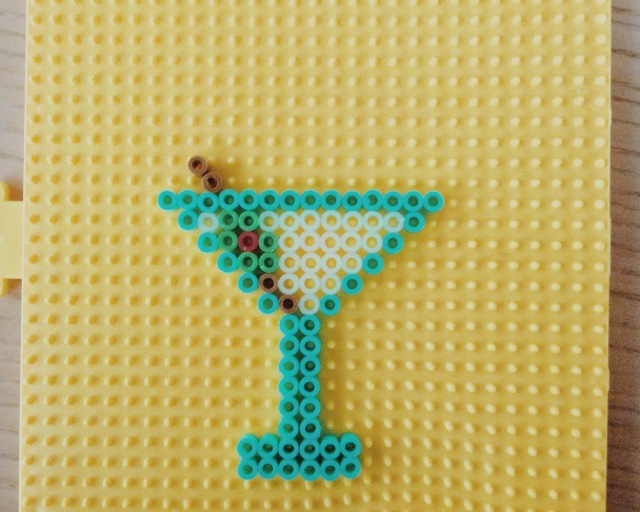
Next you put a layer of parchment paper on top of the beads and gently begin rub an iron back and forth over it. You’ll want to do this gently for a few minutes to make sure that the beads begin to fuse, but not for so long that they start to wilt and get too melty. If you are new to this it’s ok to keep checking and then continuing if need be. Then flip the peg board over so that the parchment paper is now between the beads and the table. Remove the peg board and fold the parchment paper over the exposed side of the design. Repeat ironing for another few minutes again being careful not to melt your design too much.

Allow design to cool. Once your design has cooled you can turn your fuse beads into anything.

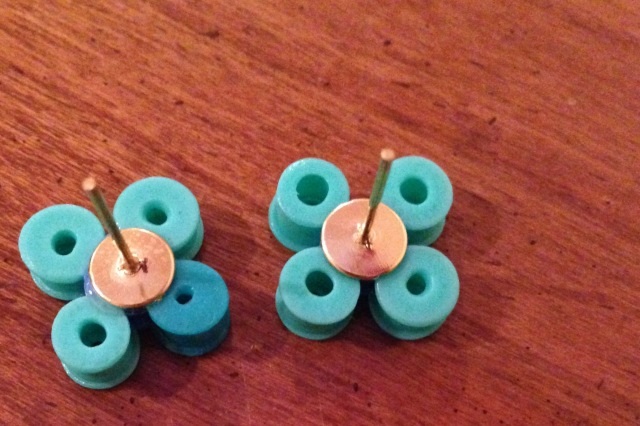
I opted for earrings and a magnet! Magnets are easy as pie to make when you buy magnets with an adhesive side. Earring posts are easily glued on with any kind of super glue. You can also easily make a set of coasters, necklaces, or a picture frame. Please share more ideas if you have them!

A Winter Spice Martini
To continue with our theme of fusion, I’ve created a cocktail here whose base is infused vodka. Infused vodka makes for a great gift and is easy to adjust to keep it seasonal. The longer you leave your infusion the more flavorful your vodka will become. I left mine for about three days before the color and flavor felt strong enough for me.

Ingredients for Winter Spice Vodka:
- 1 cup vodka
- 3 clementines halved (with peel still on)
- two cloves
- about a tsp of diced ginger
Add all ingredients to a sealable jar. Shake vigorously until arm tires to get the juices from the clementines going. Then give a firm shake two times a day for three days. Strain using coffee filter.

Ingredients for Winter Spice Martini:
- 1.5 oz Winter Spice Vodka
- 1 oz of dry vermouth
- 1 oz of orange liqueur
Add ingredients to a shaker with ice. Shake until you just can’t shake anymore or until becomes too cold to hold. Strain into Martini glass.
So here is the rub. It was delicious, but even in disguise I still knew I was drinking vodka. I’d rather not drink vodka. Ever. BUT! If you drink vodka, this is a really fun way to play around with it. Why not infuse vodka with pepper or horseradish for an extra special Bloody Mary? Or pumpkin spice for a White Girl Martini? The possibilities are endless. The results may be mixed, but that is half the fun of the H&H adventure, is it not?


