So when I got the idea for this post, I foolishly thought it would be about how to make your own yogurt at home. I’ve made yogurt at home for a couple of years now and it can save tons of money if you’re the kind of person that eats a lot of yogurt already. I made the yogurt and took the photos and then went to find a cocktail to go with. Surprisingly, although H&H has already featured one yogurt cocktail, there aren’t a ton of options out there.
Then I found the Pearls Before Swine drink at Food52. And no matter how many other recipes I looked at, I kept going back to this egg-less version of a Ramos Gin Fizz, even though I would have to find or make both orgeat (an almond-flavored syrup used often in tiki drinks) and lemon curd.
After consulting the incredibly reliable Marcia Simmons for a recipe for homemade orgeat, I knew it was too simple not to make myself. Plus, I don’t think I could find a bottle in this here metropolitan area. And I’d been curious about lemon curd for a while anyway…so I made all the things!
Homemade Yogurt
Ingredients and tools needed:
- 1/2 gallon of your milk of choice, I use 2%
- 1/4 cup of plain yogurt that has active cultures
- Stirring utensil
- Pot large enough to accommodate your milk with plenty of room to spare
- Reliable probe thermometer
- Small binder clip
- Container for your yogurt to live in, I use a Pyrex bowl that has a lid
 The active cultures are usually listed on the container below the nutrition facts and ingredients: Acidophilus, Bifidum, etc. They give yogurt its tang and helpful digestive properties.
Procedure:
Basically, the milk needs to be heated to a point that the milk proteins begin to break down and then cooled down to a hospitable temperature (110°) for the cultures in the yogurt, which then can act upon the broken down milk proteins. So:
Heat the milk on medium heat until it reaches a boil, stirring relatively constantly. The protein in the milk will quickly stick to the bottom of the pot and burn if you aren’t careful. I have found that heating the milk at medium doesn’t really take that much longer than heating it at a higher temp and I am much less likely to have a burned milk situation on my hands. It is a situation worth tears, to be certain.
 Once the milk has reached a boil (it will foam slightly and be around 210°), take it off the heat and have your thermometer handy. I stir the cooling milk occasionally to prevent a skin from forming and to help it cool more uniformly. I highly recommend clipping the binder clip to the rim of the pot and threading your thermometer through the loops, as seen here. Just make sure the probe isn’t touching the bottom of the pot.
Once the milk hits 110° or so, combine the milk and yogurt in a container and place in a warm area for 6-12 hours. The time it sits isn’t all that critical and feel free to check on it as it goes. I put my bowl in the oven and turn it on for about a minute to warm up so the cultures are kept warm and happy. The temperature you turn the oven on to isn’t important as you are just trying to warm up the oven a little bit, like to 100°, so the yogurt isn’t too cold while it sits. Just don’t forget that it’s in the oven!
When it reaches a consistency you’re happy with, it’s ready to eat or chuck in the fridge for future consumption. Do be aware, however, that the consistency of homemade yogurt is usually runnier than the store bought stuff. Not tons, but some. You are welcome to strain it further using cheesecloth, but I never bother.
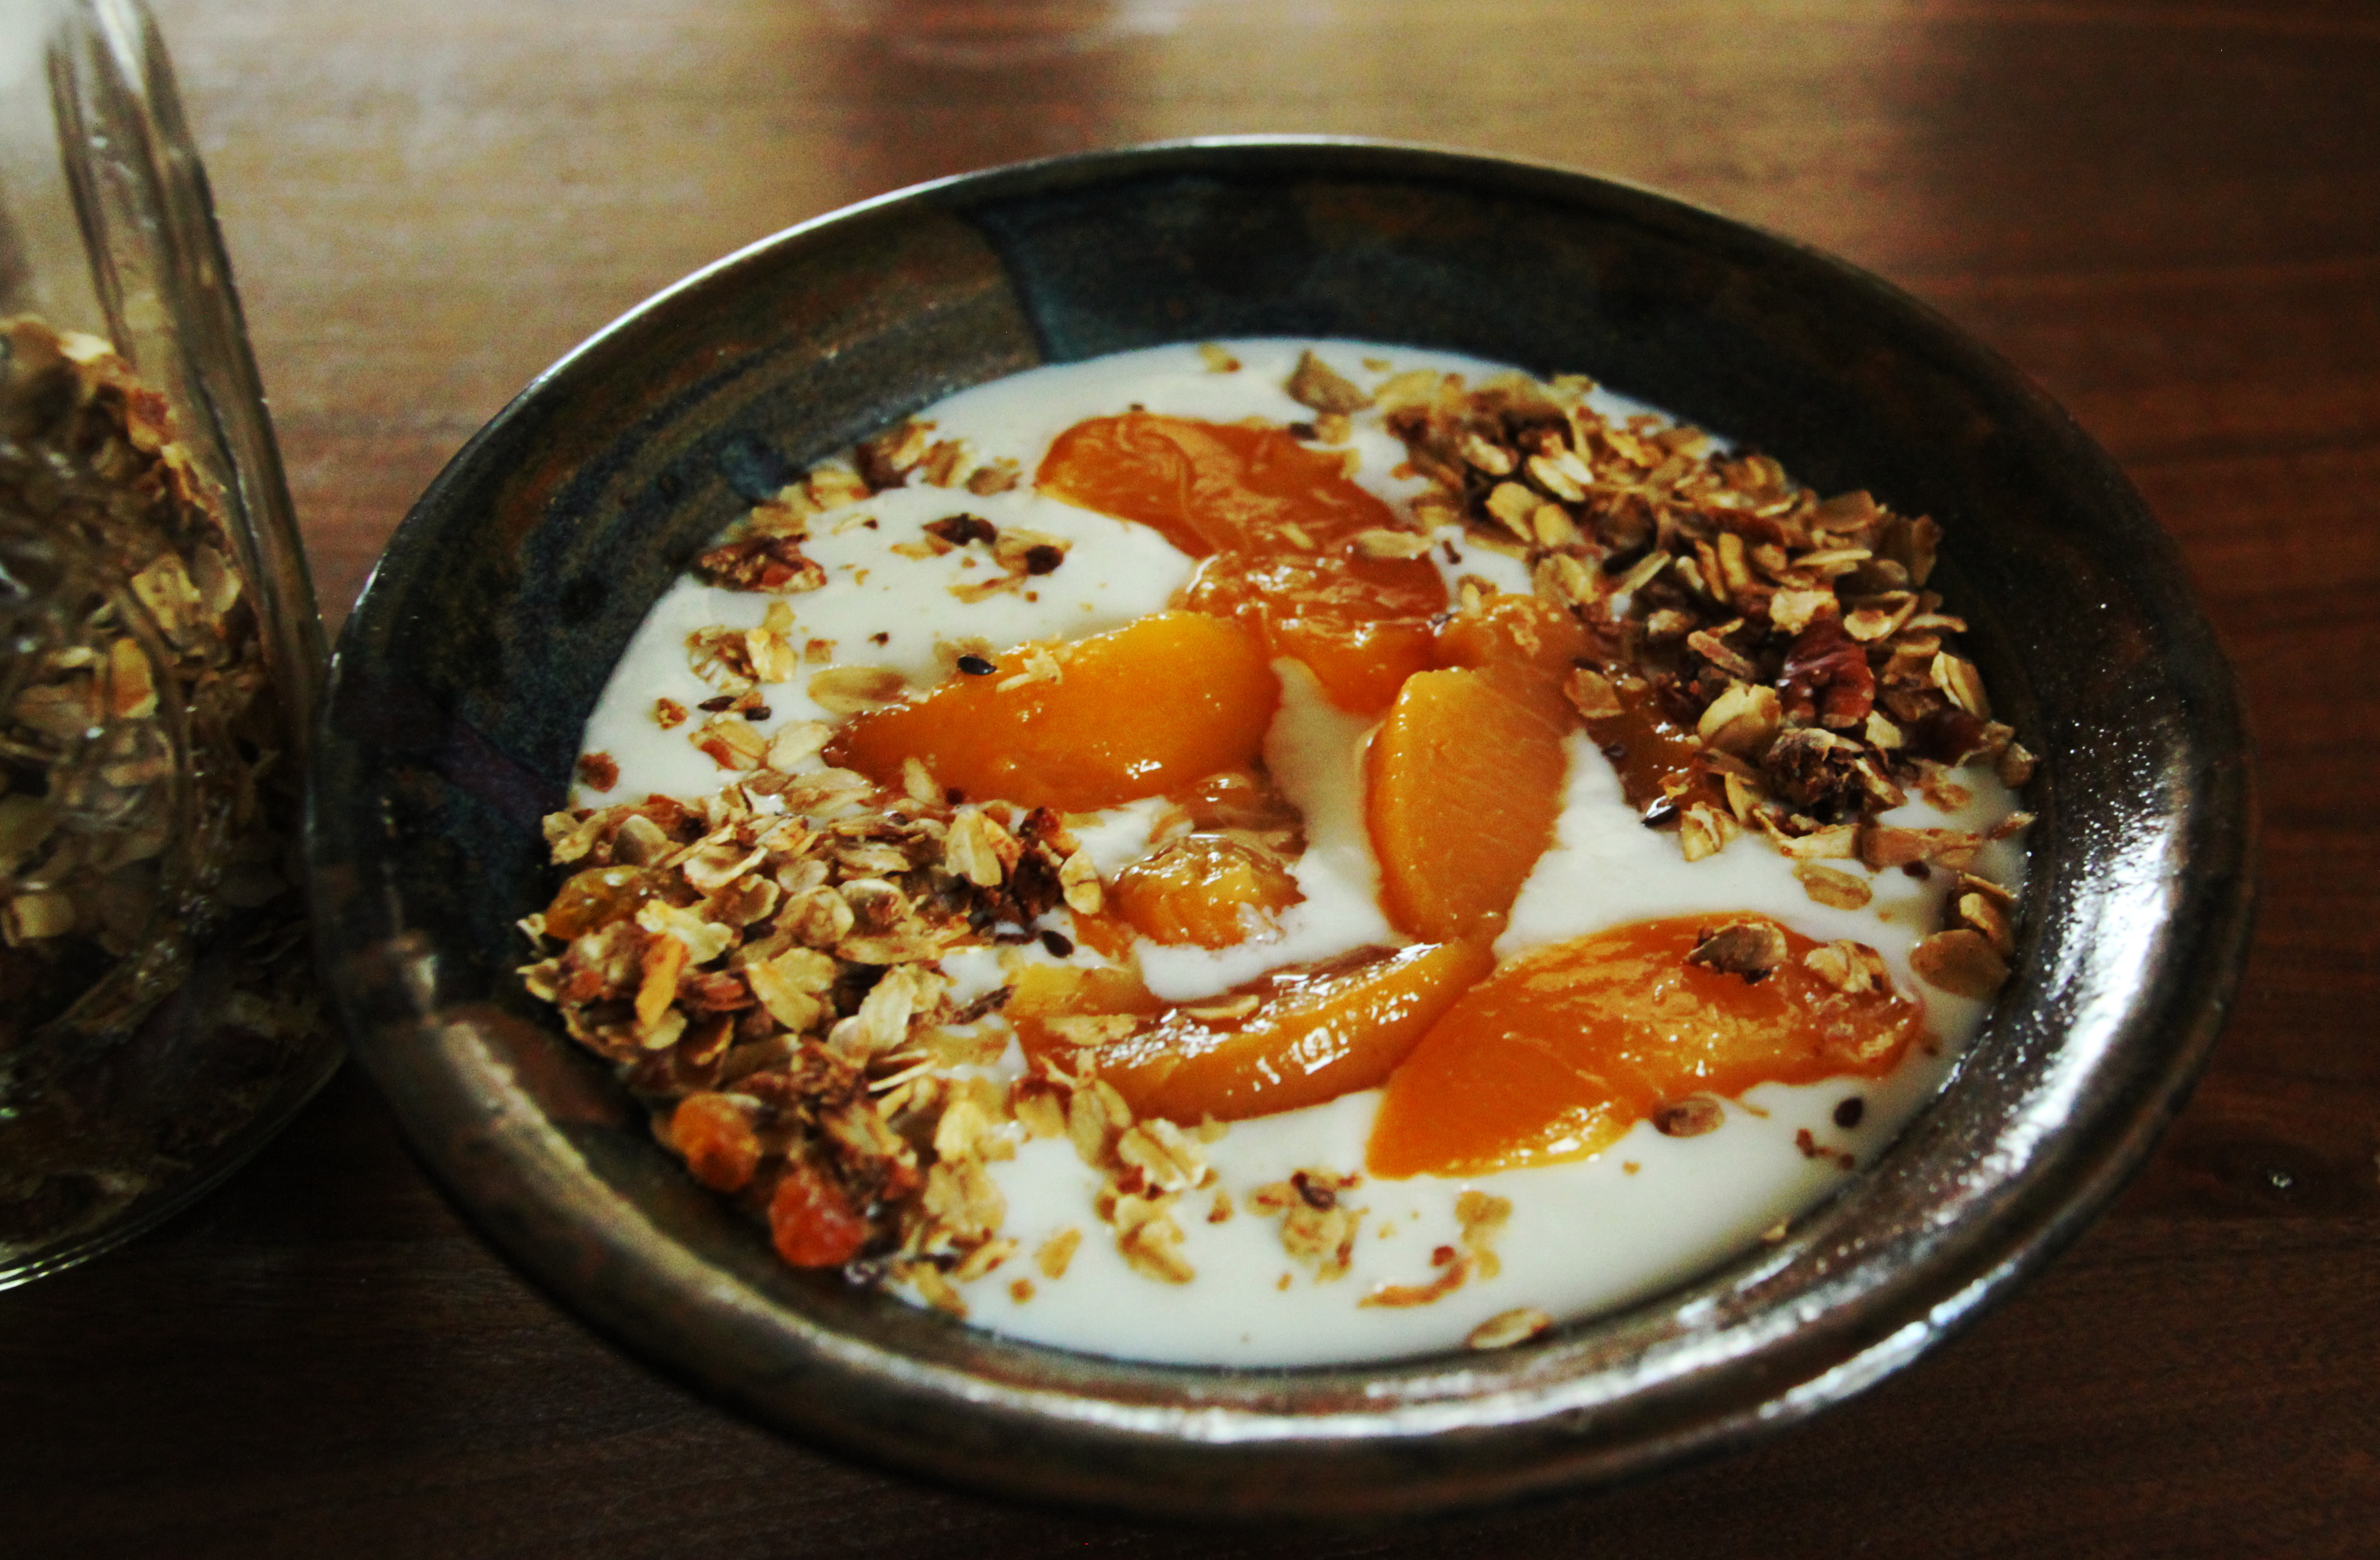 I mostly eat the stuff for breakfast with some homemade granola and honey. I opened up a jar of peaches from a summer of yore for this bowl and it was divine. Little bits of sunshine in my breakfast. This yogurt is also very handy to have if you do any Indian cooking, which occasionally happens around our house. (Now I’m dreaming of cauliflower curry…) It keeps really well, but you may not want to ask me. I’m the kind of person who, if I don’t see mold or smell weirdness, I’ll probably eat it. I know I’ve eaten homemade yogurt that’s more than two weeks old.
Oh, also, it can be used as your starter for your next batch. However, from what I have read and, to a lesser extent experienced, your homemade yogurt starter will not behave the same way bread starters do. It will not be a great starter for more than a couple of batches after the first.
Now, on to the orgeat!
DIY Orgeat
Before coming across this cocktail and deciding to take the plunge into homemade orgeat (pronounced or-zha), I had absolutely no experience with the syrup. It really does taste like liquid marzipan and that’s definitely not a bad thing. While the procedure to make the syrup is pretty straightforward, I found it difficult to time it properly during the week because the almonds are supposed to infuse the syrup for 3-12 hours. Mine ended up going for about 13 hours overnight and I think it tastes fine.
Also, I found at least five different approaches to making this syrup when doing the initial recipe selection, so look around and see what speaks to you. I almost implicitly trust Marcia Simmons at this point because she seems like the America’s Test Kitchen of infusions, so I went with hers. The almonds are toasted (and I left the skins on), so the syrup is much more brown than the milky white it usually is.
 Ingredients:
- 2 cups raw almonds, sliced or chopped
- 1 1/2 cups sugar
- 1 1/4 cups water
- 1 tsp. orange flower water
- 1 oz. vodka
NB: The vodka is added as a preservative. From what I have read, it can be safely left out if you want to use this syrup for non-alcoholic beverages, but the syrup won’t stay palatable as long. Also, orange flower water can be obtained from your friendly neighborhood Middle Eastern/Mediterranean/Amazon market for very good prices. Use it for baklava another day!
Procedure:
- Toast the almonds at 400° for four minutes. Shake the pan after two minutes.
- Cool the almonds and then pulverize in a food processor or blender.

- Combine the sugar and water in a medium saucepan over medium heat, cooking until the sugar dissolves and the mixture comes to a boil.
- Add the almonds and lower the heat to low, simmering the mixture and stirring frequently. When the mixture is about to boil, remove the pot from the heat and cover. Let the mixture infuse for 3-12 hours. Not much more than that.
- Strain the mixture through three layers of cheesecloth, squeezing as you go to get as much syrup out as possible. It gets pretty sticky.
- Add the orange flower water and vodka and bottle your orgeat. Keep refrigerated, discarding after one month.
Now, Serious Eats is a wonderful resource and their commentors know what is up. In the comments below the recipe, someone mentioned baking the spent almonds with some additional sugar at 350° until browned. I took their advice and was left with some really lovely almond crumble to add to ice cream, oatmeal (SO GOOD), your newly complete yogurt, or just eat out of hand. Highly recommended!
Stay tuned for Part II, in which we tackle a very easy lemon curd and finally get to the drinking!


Pingback: All this for a cocktail, Part II | Hooch & Home
Pingback: Cold Brew Coffee Concentrate | Hooch & Home